
- SITEMAP
- CONTACT US
- 8618267732328
News
Credibility ,the lifeblood of enterprise!
- Fittings
- Butt Welding Fittings
- Forged Fittings
- 180 Degree Elbows
- 90 Degree Elbows
- 60 Degree Elbows
- 45 Degree Elbows
- 30 Degree Elbows
- Equal Tee
- Reducing Tee
- Concentric Reducer
- Eccentric Reducer
- Lap Joint Stub End
- Outlets
- Cap
- Bend
- Cross
- Coupling
- Stainless Steel Lateral Tee
- Bellows Expansion Joints
- Flexible Metal Hose
- Non-Standard/Custom Fittings
- Bleed & Flushing Rings
- Types of Flanges
- Anchor Flanges
- Blind Flanges
- Expander Flanges
- High Hub Flanges
- Lap Joint Flanges
- Long Weld Neck Flanges
- Nipoflanges
- Orifice Flanges
- Plate Flanges
- Ring Type Joint Flanges
- Reducing Flanges
- Slip On Flanges
- Socket Weld Flanges
- Spectacle Blind Flanges
- Square Flanges
- Spades & Ring Spacers
- Threaded Flanges
- Welding Neck Flanges


Welding methods and techniques for small diameter pipes
What is a welding crack?
Welding cracks are the most common serious defect in welded components. Under the combined action of welding stress and other embrittlement factors, the bonding force of metal atoms in local areas of the welded joint is destroyed, forming new interface gaps.
It has the characteristics of sharp notches and a large aspect ratio. Cracks affect the safe use of welded components and are a very dangerous process defect.
Welding cracks occur during the welding process and have a certain incubation period, while others occur during the reheating process after welding.
What are the causes of welding cracks?
There are the following reasons for weld cracking during welding: stress, restraining force, rigidity, chemical composition, the reserved gap in the weld, current, weld bead, cleanliness of the base material, etc. These factors may all cause weld cracking.
Although there are many reasons for weld cracking, it is caused by multiple factors in different situations, and there are also two or three factors. But regardless of several factors, one major factor must be among them. Various conditions have little impact, only one factor causing weld cracking.
Therefore, weld cracking must first accurately analyze the main and secondary factors that cause cracking and take corresponding measures to solve the problem based on the main and secondary factors that cause cracking.
The welding rod and base material fusion through a high temperature current forms the weld seam during the welding process. The welding rod and base material change from solid to liquid, and the high-temperature liquid expands with heat while cooling to solid results in shrinkage. Due to thermal expansion, the welded structure naturally produces stress. Some welded structures inherently have binding forces and rigidity.
The welding process is from solid to liquid, from solid to liquid (usually molten iron), and then from liquid to solid, forming a weld seam - the transformation from liquid to solid (i.e., the transformation of molten iron into grains). The process of transforming molten iron into grains is called crystallization.
The position where the base metal temperature is low starts to crystallize, gradually extending towards the middle of the weld seam and finally crystallizing in the middle. Due to thermal expansion, the welded structure is affected by stress, constraint forces, or rigidity, which makes the base metal grains unconnected. Small cracks appear in the middle of the weld, and obvious cracks appear in the middle.
Even if the chemical composition of the base material and welding electrode is good, cracks or cracks can still occur due to the constraints and rigidity of the welding structure and the stress generated during the welding process.
Suppose the chemical composition of the base metal and welding electrode is poor (carbon, sulfur, phosphorus, etc., are relatively high), Or the reserved gap of the weld seam is too large. In that case, the base material has too many impurities at the edge of the weld seam, or the current is too high. Factors such as too fast, too slow, and too wide a weld bead can exacerbate the cracking of the weld seam.
Types of Welding Cracks and Preventive Measures
Welding cracks can be classified differently based on their location, size, cause of formation, and mechanism. According to the conditions for crack formation, it can be divided into four categories: hot crack, cold crack, reheat crack, and layered tear.
According to the cracking situation of welding seams on site, most are caused by stress, restraint force, and rigidity. Stress, restraining force, and rigidity are often the main factors causing weld cracking.
Adopting fixed welding and dispersed welding is the most effective way to solve the problem of weld cracking caused by stress, restraining force, and rigidity.
The so-called fixed welding refers to fixing all the welds or important parts of the weldment using small currents, narrow welding passes, and a short distance off welding. This makes it difficult for the weldment to generate significant stress.
Even if the welding piece is fixed at all points, it cannot move forward in the same position in the sequence, let alone use high current and large specification welding rods. Welding should be done in a different position to prevent excessive heat from being generated locally. Both constrained and rigid structures can be solved using the same method.
The so-called dispersed welding is not allowed large structures to be welded in the same position in the sequence, and welding should be carried out by changing positions.
For large structures, fixed welding must be carried out first, and dispersed welding should be adopted. The first welding pass cannot be used with high current and large specification welding rods. All welds are scattered from beginning to end for the overall large structure. Otherwise, although the welds do not crack, the residual stress is too high.
Welding methods and techniques for small diameter pipes
Four welding techniques to note when welding small diameter pipes:
1. Small diameter pipe butt joint horizontal fixed welding groove and assembly method
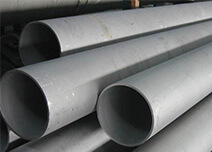
(1) Test piece material: #20 seamless steel pipes.
(2) Sample specification: 60mmx4mm, L=200mm, as shown in the figure.
(3) Groove size: 60 ° V-shaped groove with a 0.5-1mm blunt edge.
(4) Welding material: E4303 or E5015 welding rod, with a diameter of 2.5mm or 3.2mm.
(5) Welding requirements: Single sided welding and double-sided forming.
(6) Assembly of test pieces.

Figure 1
- 1) Grinding the blunt edge to be 1-1.5mm, without burrs, with a misalignment of<0.5mm.
- 2) Clean the test piece. Use an angle grinder, file, emery cloth, and wire brush to clean any oil, moisture, oxides, burrs, and rust within a range of 20mm on both sides of the groove until a metallic luster is exposed.
- 3) Assembly and positioning welding of specimens. Align and align the cleaned specimen with a 3-4mm gap. Using formal welding techniques and materials, weld one point in the inclined flat position (climbing up the slope) of the specimen groove, and treat the positioning welding points into a sloped shape with appropriate reverse deformation.
After assembly and inspection, fix the pipe on the operating frame according to the welding position and appropriate height for welding. The test piece for horizontal fixed welding of small diameter pipes is shown in the above figure.
2. Welding Technology for Horizontal Fixed Bottom Layer of Small Diameter Pipe Butt Joint
(1) Arc striking - continuous arc welding arc striking
When using alkaline welding rods for welding, during the arc starting process, due to the lack of slag and protective gas in the arc, the protective effect of the molten pool is not good, and the weld seam is prone to dense pores, mostly N2 pores.
To prevent such phenomena, the arc striking method of alkaline welding rods is often used for scratching. After striking the arc 10mm in front of the starting welding position at 6 o'clock clock, pull the arc to the starting welding position and immediately preheat the arc at 6 o'clock. When the "sweating" phenomenon is found at the root of the groove, push the welding rod into the groove gap. After hearing the "popping" sound, pause to melt 1-2mm on each side of the blunt edge and form the first molten hole. At this time, the arc striking work is completed.
Alkaline welding rods require a current of about 10% less than acidic welding rods of the same diameter. Therefore, during the arc striking process, it is required that the welder must have stable hands and high skills, and the arc striking and arc returning actions should be fast and accurate.
(2) Arc welding and striking
Start the arc at the clock’s 6-5 o’clock position, which is the overhead welding position, and preheat with a long arc. When the end of the welding rod shows a melting state, use wrist force to shake off the first and second droplets of the welding rod end.
At the same time, when observing "sweating" at the preheating point, quickly and accurately feed the welding rod droplets into the gap at the starting welding end. While slightly swinging left and right, push the welding rod back and up slightly, and then carry and extinguish the arc diagonally downwards. The first molten pool is thus formed, and the arc striking work is completed.
(3) Welding rod angle
- 1) The starting welding point is at 5-6 o'clock, and the angle between the welding rod and the tangent line of the welding direction pipe is 80-85 °.
- 2) At the clock’s 7-8 o’clock position, the upward welding and climbing welding are carried out, and the angle between the welding rod and the tangent line of the welding direction pipe is 100 ° - 105 °.
- 3) At the vertical welding position, the angle between the welding rod and the tangent line of the welding direction pipe is 90 ° at the 9 o'clock position.
- 4) During the welding process at the vertical climbing position and the 10 to 11 o'clock position, the angle between the welding rod and the tangent line of the welding direction pipe is 85 to 90 °.
- 5) When welding at the flat welding position, the angle between the welding rod and the tangent line of the welding direction pipe is 75-80 ° when welding at the 12:00 o'clock position.
The angle of the welding rod at each point is shown in Figures 2 and 3. The welding positions corresponding to the first and second half circles have the same welding rod angles.

Figure 2 Angle of Welding Rods at Various Points on the Bottom Layer of Horizontal Fixed Pipe

Figure 3 Schematic diagram of welding operation method for horizontal fixed pipes
3. Welding Technology for Horizontal Fixed Cover Layer of Small Diameter Pipe Butt Joint
Carefully clean the slag at the corner between the base layer weld seam and the base metal on both sides of the groove and the slag at the overlap of the solder joint and the solder joint.
The strip operation method starts at the clock’s 5-6 o’clock position, the overhead welding position. Then it preheats the overhead welding area with a long arc to shake off the first and second molten droplets, as the temperature of the droplets at this time is low and the fluidity is poor. Then, the molten droplets are fed upwards in a short arc manner, and welding is carried out using a crescent shaped or transverse serrated rod transport method. During the welding process, always maintain a short arc. When the welding rod is placed on both sides, pause. Melt the edges of both sides of the groove for 1-2mm to ensure a smooth transition between the weld metal and the base metal and prevent undercut defects. During welding, the molten pool should always maintain an elliptical shape and consistent size, and the molten pool should be bright and clear. When closing the first half of the arc, it is necessary to slightly fill the arc crater with molten metal to create a sloping shape, creating conditions for the closure of the second half of the weld seam. Before welding the second half of the circle, the welding slag at the beginning of the first half of the circle should be knocked off by 10-15mm, and attention should be paid to filling the crater when the weld is finished. When using alkaline welding rods to weld the cover layer, always use a short arc preheating and welding, and the arc striking method adopts the scratch method.
The angle of the welding rod is because the base layer weld seam at the root has been welded, and the cover layer weld seam is not related to whether the root is fully welded. The main technical issue is that the cover layer weld seam should be well-formed, the excess height should comply with technical regulations, and the weld seam should transition smoothly to the base metal without undercutting. For this reason, the angle between the welding rod and the tangent line of the pipe welding direction should be slightly greater than that of the base layer welding by about 5 °, as shown in Figure 4.

Figure 4 Welding rod angles at various points on the horizontal fixed pipe cover surface layer
- (1) At the overhead welding position, the angle between the welding rod and the tangent line of the welding direction pipe is 85 ° - 90 °, which is between 6 and 7 o'clock on the clock.
- (2) At the uphill climbing welding position, the angle between the welding rod and the tangent line of the welding direction pipe is 105 ° - 110 ° at the 7-8 o'clock position.
- (3) The vertical welding position is at 9 o'clock, and the angle between the welding rod and the tangent line of the welding direction pipe is 95 °.
- (4) At the vertical climbing welding position, the angle between the welding rod and the tangent line of the welding direction pipe is 90 ° - 95 °, at the position of 10 to 11 o'clock on the clock.
- (5) At the flat welding position, which is the 12 o'clock position, the angle between the welding rod and the tangent line of the welding direction pipe is 75 °-80°.
4. Steps and precautions
- 1) Familiar with the pattern, clean the groove surface, and file the blunt edges.
- 2) Assemble the test piece according to the assembly requirements, perform positioning welding, and fix the test piece horizontally on the welding bracket at 800-900mm in height from the ground for welding.
- 3) Start welding from the overhead welding position of the pipe by striking the arc, weld the right half circle counterclockwise first, and use the arc breaking method to weld to the flat welding position.
- 4) Clean the welding slag and grind the joints in the raised and flat welding positions to form a gentle slope.
- 5) Change the welding position, weld the left half circle, start at the gentle slope of the overhead welding position, or cut it into a gentle slope with an arc before starting, and complete the welding of the base layer using the same operation method as the right half circle.
- 6) Clean up welding slag and splashes, weld the cover layer, and use the two half-circle welding methods. When welding, use the crescent or transverse serrated strip welding method, and pay attention to filling the arc crater when closing the arc.
- 7) After welding, clean the welding slag and splashes from the inner and outer welds of the pipe fittings and inspect the welds on both sides.

Tel No:+86-18267732328 / Email:[email protected]
Address:Longwan District, Wenzhou, Zhejiang Province, China.
Copyright Notice © www.yaang.com Yaang Pipe Industry Co., Limited All rights reserved.
Yaang Pipe Industry Co., Ltd. is an international supplier of piping solutions for flange, butt welding fittings, socket welding fittings and threaded fittings. Our products are widely used in different industrial fields, including oil and gas, chemical industry, petrochemical industry, power plant, pulp and paper industry, environmental and water conservancy engineering, engineering projects, etc.
